A solid 3D CAD model can be enough for an initial CNC machining quote when the part can use the supplier’s general tolerances and standard finish. Send the material grade, quantity, and target delivery date with the model. Add a matching 2D drawing when the supplier needs specific instructions to price a fit, thread, surface treatment, or inspection requirement.
The decision comes down to what the shop can confirm from your request. A supplier can see a bore in a STEP model and estimate how to machine it. If that bore locates a mating component, the estimator also needs its allowable size, any location tolerance, and the condition in which it will be measured. Those details can change the machining sequence and inspection work.
When a 3D Model Is Enough for a CNC Machining Quote
A model-only quote refers to a price estimate based on a 3D CAD model and written order requirements, with any remaining assumptions confirmed by the supplier.
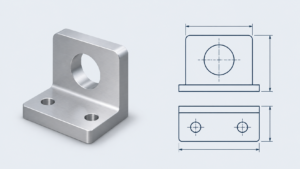
Consider an early prototype bracket used to check whether an assembly fits inside an enclosure. The buyer can send a STEP solid, specify 6061-T6 aluminum and five pieces, and request an as-machined finish. If the mounting features work within the shop’s general tolerances, that package can support a useful estimate. The same bracket may need a drawing later if testing shows that a bore has to locate a sensor consistently or that a mounting face needs a tighter flatness requirement. The file package should follow the job the part has to do.
General tolerances vary with the supplier and the manufacturing route. Protolabs publishes ±0.005 in., about ±0.127 mm, for standard prototype and production machining at its automated factory. Its guidance also lists ±0.002 in., about ±0.051 mm, for a precision machining option. Xometry’s quoting instructions ask buyers to flag tapped holes or tolerances tighter than ±0.005 in. in its Features tab, with a PDF drawing available as an attachment. These are examples of how two suppliers handle requirements in their own workflows. Confirm the limits that apply to the specific feature and route on your quote.
For a cross-border purchase, put the units in the RFQ and check them again on the returned quote. A buyer may work in millimetres while a supplier’s portal displays inches. Also confirm how the shop defines its standard finish. An as-machined surface can be acceptable on an internal prototype, while a visible production face may need a cosmetic requirement or a specified roughness. Decide which condition your team can accept before you compare bids.
A STEP-first request can also help when you are still deciding between materials or order quantities. Ask the supplier to price the version you can already define. If the finish or a critical dimension is still open, identify it as pending and ask whether it could change the process or price. That gives procurement a usable budget figure and gives engineering a specific question to resolve.
Action. Before relying on a model-only quote, ask the supplier to confirm the material, general tolerances, finish, and any open assumptions in writing.
What a 2D Drawing Adds to a CNC Machining Quote
A 2D engineering drawing refers to a controlled document that identifies the part and specifies the dimensions, tolerances, and other requirements used to manufacture and inspect it.
A nominal diameter gives the shop a starting point. The allowable variation determines which finished diameters the buyer will accept. The same distinction applies to hole location, thread depth, and surface condition. A drawing gives the estimator a place to see which of those requirements apply, where they apply, and whether the proposed process can meet them. For example, a tight position requirement may affect how the part is held, which features are machined in the same setup, and how the hole pattern is checked.
| Requirement | What to put on the drawing |
|---|---|
| Critical size or fit | Identify the feature, its nominal size, and the permissible variation. Specify the finished condition where it matters. |
| Geometric control | Apply the required geometric dimensioning and tolerancing (GD&T) callout. Identify the datums, or reference features, where the control requires them. |
| Thread or insert | State the thread designation and, for a blind hole, the required usable thread depth. Identify any insert the supplier is expected to install. |
| Surface or coating | Identify the affected faces, the required finish or roughness, and any areas to mask. Clarify which dimensions apply after treatment. |
| Inspection | Flag features that need special verification. Reference the reporting requirement or include it in the RFQ so the estimator can price it. |
A section view or enlarged detail can make an internal feature easier to quote. Use one where the shop needs to see the relationship between a bore, counterbore, groove, or blind thread. For a blind threaded hole, the depth of the drilled hole and the usable thread depth are separate pieces of information. If the assembly needs a minimum engagement, make that requirement explicit.
I opened NIST’s public PMI Complex Test Case 1, Revision D, and reviewed the lower-left detail as I would a drawing in an RFQ. I found a four-hole size callout and a separate position control referencing datums A, B, and C. I recorded two checks for the same pattern: the size of the holes and their location relative to the stated references. The detail made it easy to see how an estimator could account for drilling the holes and still need a separate plan for verifying their position.
The opportunity is to be selective. If a locating bore determines assembly fit, control that bore. If the outside profile only needs to clear a cover, ask engineering what clearance is required and whether the general tolerance will cover it. Applying tighter limits across the whole part can add machining or inspection effort to features with little effect on performance. A targeted drawing gives suppliers room to propose a simpler process around the features that still have to meet the print.
Action. Review the drawing with engineering before sending it and identify the specific features that control fit, function, appearance, or acceptance.
When an Annotated STEP File Can Carry the Requirements
Product and manufacturing information, or PMI, refers to annotations and attributes associated with a 3D model that describe requirements such as dimensions, geometric tolerances, and datum features.
STEP is a family of standards for exchanging product model data between software systems. A geometry export and an annotated export can both have a .step extension. NIST’s public test library includes geometry-only AP203 examples and AP242 examples with PMI. The extension tells you the file format. To establish which requirements travel with the model, review the exported file and confirm what the supplier sees after importing it.
NIST distinguishes two forms that matter here. Graphic PMI preserves the visual presentation of annotations. Semantic PMI represents requirements in a form software can interpret, including dimensional tolerances, geometric tolerances, and datum features. An estimator may be able to view a callout on screen while the inspection software handles that information differently. Ask about both steps if you expect the model to be used through quoting, machining, and inspection.
Take an illustrative housing with a bore that needs a positional check. Your design system shows the tolerance against the mounting face and two locating features. The practical test is to ask the shop to identify that tolerance and the referenced datums from the file it received. If inspection will use the annotated model, confirm that the inspection team can access the same information. If the supplier needs a PDF for that workflow, include one with the same revision and agree on the controlling document before the quote is finalized.
An agreed model-based workflow can make revision control easier for repeat purchases. A supplier that has verified its import can work from a defined model and its annotations. A conventional STEP and PDF package remains practical when you are qualifying several shops with different software or inspection processes. In either workflow, send material, quantities, delivery targets, and reporting needs with the files. Those commercial details can change from one order to the next even when the geometry stays the same.
Action. Before using an annotated STEP as the controlling file, have the supplier confirm it can read one critical callout and its datums from the exported model.
What to Include in a CNC Machining RFQ
A CNC machining request for quotation, or RFQ, refers to the package of files and order requirements a supplier uses to estimate the work, price, and delivery schedule for a part.
Put the part number, revision, material, and quantities where the estimator can see them at a glance. Attach the current STEP solid and the corresponding PDF when the part has drawing-controlled requirements. For each part, state the material grade and condition, finish, target delivery date and destination, and the inspection records you expect with the shipment. If you will accept an equivalent material or a different finish, identify it as an option that needs approval. Suppliers can then price the specified version and show any proposed changes separately.
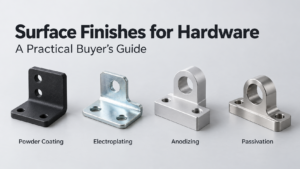
Here is an illustrative RFQ for an anodized mounting bracket. The buyer wants 25 pieces for a pilot build and a separate price for a potential 250-piece order. The STEP and PDF both carry part number BRKT-014 and revision B. The material is 6061-T6 aluminum. The drawing gives the locating bore’s limits in the finished condition, identifies two M4 × 0.7 blind threads and their minimum usable depth, and marks the bore for masking. The RFQ requests a dimensional report on the locating bore and asks the supplier to state whether the 250-piece price assumes one production run or scheduled releases.
That last distinction is worth making explicit. A shop can estimate setup and first-off inspection as batch costs. One run of 250 pieces and multiple smaller releases can involve different setups, delivery dates, and commercial terms. If the delivery schedule is open, ask for the supplier’s assumptions alongside the price. You can compare a single-run option with scheduled releases once the terms are clear.
Use this checklist before releasing the package:
- Files and revision. Identify the part number, units, and approved revision. Match the STEP, PDF, and any referenced specifications.
- Material and finish. State the grade, condition, coating or treatment, and any areas that need masking. Identify approved alternatives separately.
- Quantity and delivery. List each quantity to price, the intended batch or release schedule, the destination, and the date you need the parts.
- Inspection and records. List the critical features to report and specify any required first-article report, material certificate, or coating record.
- Open decisions. Flag any detail still under review. Ask the supplier to state the assumption it used and the effect of a change where it can estimate one.
If the CAD and PDF disagree, identify the discrepancy and send the corrected, approved files before final pricing. A difference in hole size or thread callout can change tooling, inspection, or both. Record which revision the supplier priced so a later design change can be handled against a clear baseline.
Action. Send every supplier the same revision-controlled RFQ and ask each one to return its assumptions, exclusions, and priced quantities with the quote.
How to Compare CNC Machining Quotes Before Ordering
Quote comparison refers to checking that competing offers cover the same part revision, quantities, manufacturing requirements, inspection work, and delivery scope before comparing prices.
Start with the requirements that can change the route. For the illustrative bracket, one offer may include machining, anodizing, masking, and the bore report. Another may include machining and anodizing with masking and reporting priced separately. Ask both suppliers to state what is included for the same drawing revision and quantity. If an estimator has proposed a different finish or a revised tolerance, have engineering review that change and compare it as a separate option.
Separate one-time and batch costs from the recurring piece price. In an illustrative estimate, a $150 setup charge adds $6.00 per part on 25 pieces and $0.60 per part on 250 pieces when each quantity is run as one batch. At an assumed $12.00 recurring piece price, the totals before other charges would be $18.00 e $12.60 per part, respectively. Those figures show how the arithmetic works. For a real order, confirm whether setup is charged once per order, once per release, or under a different arrangement.
Give lead time the same scrutiny. Check the event that starts the clock and the milestone at the end. A quote may start from drawing approval or material availability. The end date could mean completion of machining, readiness to ship after finishing and inspection, or delivery to your site. If you need to approve a first article, ask where the approval falls in the schedule. These differences matter when you are comparing international suppliers or coordinating the parts with an assembly build.
Use the differences to identify savings that preserve the design intent. If both shops flag the same tolerance as a cost driver, ask which operation or inspection step it changes. Engineering may confirm that the tolerance is essential, or it may find that a wider limit still works with the mating component. If the requirement changes, release a revised drawing and have suppliers quote that revision. The purchasing record should make it clear which option was approved.
Action. Before issuing the purchase order, confirm the quoted revision, batch schedule, included finishing and inspection, one-time charges, and delivery milestone on one comparison sheet.
Domande frequenti
A: A STEP file can support an initial quote when the geometry is complete and you supply the material, quantity, finish, and delivery target. Ask what tolerances and inspection assumptions apply. If a functional feature needs a specific limit, add that requirement before asking for final pricing.
A: Ask whether the shop can estimate from the drawing you have. Provide readable views, dimensions, and notes, along with the order details. If a solid model is needed to evaluate complex geometry or plan the machining, ask whether creating it will add a charge or change the lead time.
A: Use it where the supplier’s stated limits meet the part’s functional and assembly requirements. Apply individual controls to features such as bearing seats, locating holes, or sealing faces where the design needs them. Confirm both the general limits and the feature-specific limits before ordering.
A: Identify the conflicting feature, confirm the approved requirement with engineering, and issue a matching model and drawing. Ask the supplier to update the quote to reference the corrected revision. This gives both teams the same reference for pricing and acceptance.
A: An AP242 file with PMI can carry manufacturing requirements if the buyer and supplier agree to use it and verify that the necessary annotations import correctly. Confirm how the shop will use those annotations for inspection as well as estimating.
A: Include the deliverables in the RFQ so they are visible when the shop estimates the work. Identify the drawing revision and features the report must cover, then check that the quote includes the agreed records.